Your information saved successfully.
Widget Confirmation & Approval
Options for the confirmation view and approval requests
Whether you want all requests to be approved automatically or want them to come to a staff member for review, we’ve got you covered.
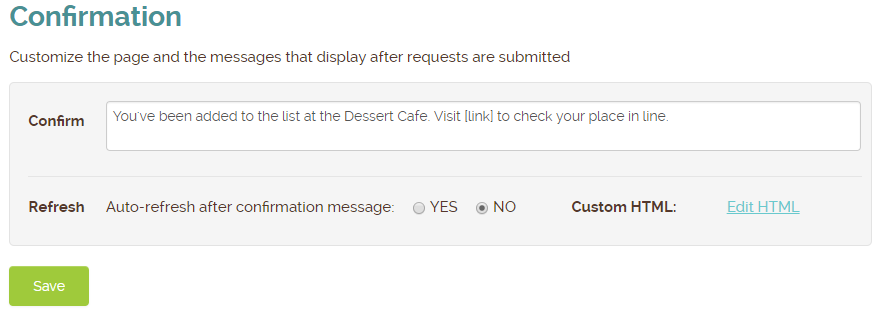
Confirmation
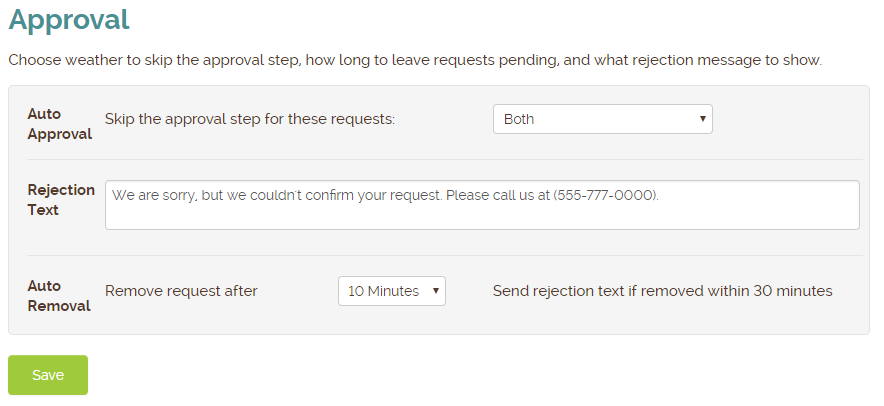
Approval
Widget Settings
As a reminder on where to edit these settings, login to your account at Waitlist Me and go to Account > Settings > Add Yourself. As you choose different options and save them, use the Page link at the top to see the updates.
Back to web widget main page.
Confirmation
- The Confirmation message will display in the widget box after a client enters their information. You can enter something as simple as ‘Thanks! We’ll be with you soon.’
- Choose whether you want the page to auto-refresh shortly after the confirmation message.
- Pro & Platinum users will see a Custom HTML link which gives the option to add text/pictures to the area outside of the widget box. This will display after a request is submitted. This is a good place to add your logo or important instructions you want customers to be aware of.
Approval
- Leave the Auto Approval set to Off if you would like all requests to come to a staff member to accept/reject. (If using this option, on the tablet or phone you use to manage Waitlist Me you can enable the Alert Sounds to play a sound along with the notification that a person submitted a request.) Or, choose to have requests automatically accepted. The two higher subscription tiers can set up scheduling rules to make it easier to control what requests are automatically accepted.
- If Auto Approval is Off, you will see options for the Rejection Text and Auto Removal Time. The Removal time lets you select any time between 5 minutes and 7 days to allow a request to remain active before the it gets rejected. The Rejection Message will go out if the request is rejected within 30 minutes of when it was submitted.
Widget Settings
As a reminder on where to edit these settings, login to your account at Waitlist Me and go to Account > Settings > Add Yourself. As you choose different options and save them, use the Page link at the top to see the updates.
Back to web widget main page.