Your information saved successfully.
Kiosk Input Fields
Define the information required at check in
Want to make a phone number required at check in? Or display a set of pre-defined notes to customers? These are a few of several options you can customize based on the information you'd like from customers when they check in.
Your choices for these Input Fields determine what the guest will see following their selection of whether to make a reservation or waitlist request. The options are quite straight-forward:
Edit mode
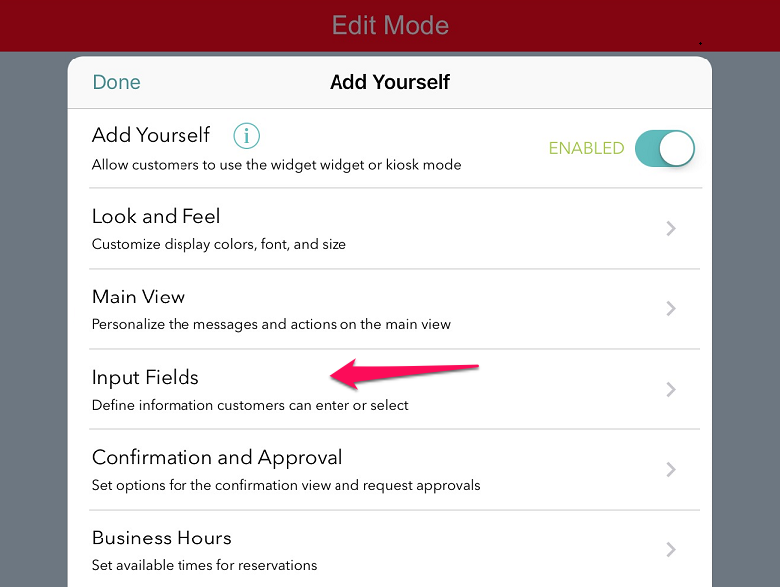
As a reminder on where to edit these settings, first turn on Kiosk Mode by pressing the gear icon > Add Yourself > select On for Kiosk Mode. Once you’ve entered the kiosk, select the menu on the upper right and choose Edit Settings. Enter your password to get into the Edit Mode.
You’ll now see a red bar across the top that lets you know you’re in Edit Mode, and the gear icon on the left will take you into a menu where you can choose the Input Fields.
Back to self check-in kiosk main page.
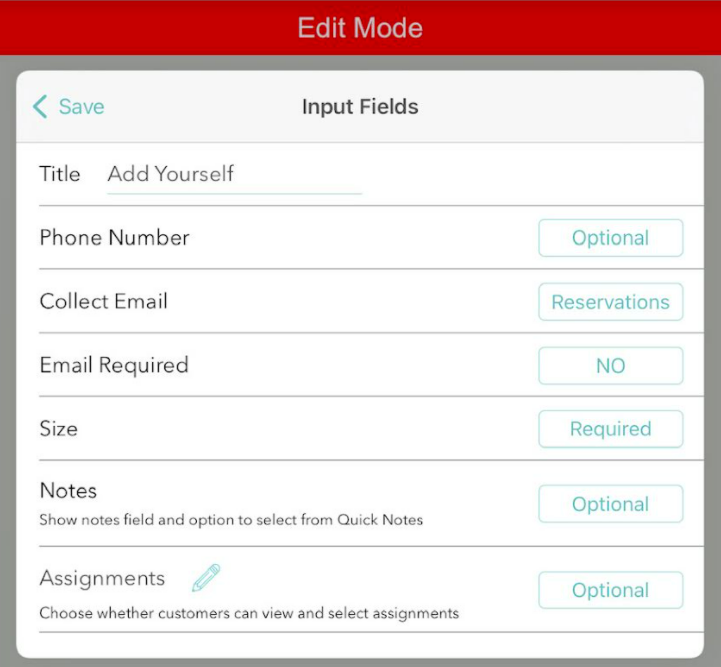
Your choices for these Input Fields determine what the guest will see following their selection of whether to make a reservation or waitlist request. The options are quite straight-forward:
- Tap in the Title field to change the text in the input box header
- Choose whether the phone number is required, optional, or hide the field completely.
- Choose to have guests enter their email for waitlist, reservations, or both, and also make the field required or optional.
- Hide the group size if you don’t need it (if your business serves individuals rather than groups).
- Choose if you want the notes field displayed, and if so, whether you want customers to have access to your predefined list of Quick Notes.
- If you'd like customers to choose an Assignment as they’re checking in, enable this option, and you can change the wording of this field. For example you might label the field as "Staff" if you'd like to give an option to request a specific staff member. Please note, this feature is only available for Pro & Platinum users.
Edit mode
As a reminder on where to edit these settings, first turn on Kiosk Mode by pressing the gear icon > Add Yourself > select On for Kiosk Mode. Once you’ve entered the kiosk, select the menu on the upper right and choose Edit Settings. Enter your password to get into the Edit Mode.
You’ll now see a red bar across the top that lets you know you’re in Edit Mode, and the gear icon on the left will take you into a menu where you can choose the Input Fields.
Back to self check-in kiosk main page.